In honor of it being so wet and cold and feeling like winter was never going to leave, we decided to learn about the water cycle. (note; we started this the last week of April, it was very wet and rainy. But due to a crazy work schedule we ran out of April time. May has been gorgeous so far, so some of these pictures include sun).
The water cycle is a great little unit for little kids. In fact I think the water cycle is just about a perfect little unit for little kids. Almost a week later Aimee is still talking about the water cycle! (Note; two months later Aimee is still talking about the water cycle, constantly and points out evaporation, she even uses the word evaporation. Quite frankly I am floored and thrilled). I am so satisfied with how this week turned out! It is a good visual science that you can learn. It happens right before their eyes and all you have to do is add the words and explanation.
~Books~
(all the books this week were non-fiction)(see that bright ray of sunshine, messing up my water week).
Where do Puddles go? by Fay Robinson- This is a 'rookie read-about science' book, it is a great series for introducing concepts to kids in the early preschool age. Very straight forward and simple. Loved!
Water Everywhere! by Christine Taylor-Butler- This was another very simple book, but didn't directly talk about the water cycle. Instead it showed all of the ways we use/need water everyday.
Did a Dinosaur Drink this water? by Robert E. Wells- This was a pretty fun book, a little long winded though. It shows almost every aspect of the water cycle, which is great, however can almost be too much information. My husband stated there was too much written on each page, which is fairly true and something we never say. It is helpful in learning an introduction for every aspect of water, but we had to skip some pieces. This would be a better book for late elementary.
The Drop Goes Plop by Sam Godwin- This was another one of our favorites this week. A little bird and his mom follow a drop of water and find out all about the water cycle. Summed up in a sentence per page, with explanatory dialogue by the mother bird, this was one of the more helpful books in explaining the water cycle to my daughter.
The Snowflake a water cycle story by Neil Waldman- This was the only fiction type, poetry feel, story we did. The snowflake represents the water cycle, we see and follow the snowflakes changes and travels through the water cycle and through the different months of the year. In January he is a snowflake falling on the mountain, In Feb. he is ice, March he melts and goes down the stream and so on. Good for introducing the states of matter.
Earth's Water Cycle by Amy Bauman-We didn't actually read this story together, but it was helpful to me so that I could answer questions and explain further. It is a very very in depth look at the water cycle and would be wonderful for middle school.
~Water Cycle Illustrations~
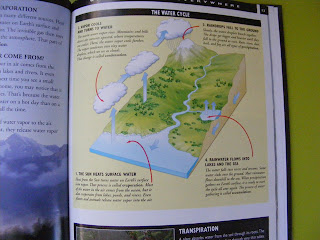
A fun activity with the books was to look at all the different ways the water cycles was illustrated.
As you can see the water cycle consists of many steps and there are many words you can introduce to describe these steps. We focused on evaporation, condensation, participation and collection. You can also do evapotranspiration or transpiration or vapotranspiration which is the water that evaporates from sources which are not bodies of water. Such as plants, soil and other land objects. When we are older we can talk about that. The four words I mentioned were big enough for us already. So after reading about the water cycle and looking at the different ways it can be described (drawn) we made our own.
All supplies gathered we have, cotton balls, markers, water color paints, construction paper, scissors and glue. Oh and water for the water colors.
First we created a little land scene out of the construction paper, with land and water and a run off stream to get the full effect. Then we added cotton balls for our clouds. The ones showing evaporation into initial condensation we kept white. The ones showing full condensation and precipitation we painted black/gray. This was a good time to talk about why you can see rain clouds when you can't see evaporation. This is due to the dust/pollution/anything else unsavory in the air that gets trapped in the water particles. The water particles then become visible when they condense due to all the foreign non-water material. Of course that is the adult version. It is pretty easy to simplify though, especially if you live somewhere that has a visible brown cloud/smog. We don't but most cities due. Thank you Michigan for your over abundance of trees!
This is what we ended up with. The rainbow and the mermaid are my daughters special additions. Apparently mermaids help supervise the run off, collection and evaporation procedures. Good stuff. We hung this picture up (until the cat started going after the cotton balls), to demonstrate and refer back to.
~Water Pictures~
The next project we did (actually we had to wait a week for this project due to a surprising lack of rain, but blog organization puts it here) were water pictures. This is a very easy rainy day project. Just take a thick piece of paper, card stock, left over piece of poster board, cardboard, anything that won't easily tear after getting wet. Draw a full colored picture on it, you want the whole thing colored in and place it outside in the rain. Wait a couple minutes to a half hour, depending on how hard it is raining until you get the desired effect.
We used left over poster board and regular crayola washable markers.
It was a drizzling the day we did this project, so we left them out for about 15 minutes. The rainbow one shows the effect better then the tulip.
~Stages of Matter~
Matter is pretty easy to describe, it is anything and everything, so I guess it might be a little harder to describe. I believe we might have even skipped this word entirely and just started talking about how everything is a liquid, solid or gas. They Might Be Giants has an awesome science Cd, on that Cd they have a song about states of matter. We watched it frequently this week. Solid, Liquid, Gas Video.
Anyway, to describe and show the different stages of matter we did a very easy project, using water, water is perfect because it can be manipulated to show all the states of matter. In fact you probably do this experiment every other day, if not every day. *Note; for younger kiddos, this project involves the stove, so please please do it with caution and supervision. This is also a great time/example of how hot the stove is.
Supplies you will need for this experiment; pot with water, ice cubes, very cold glass of water, stove, food coloring if desired.
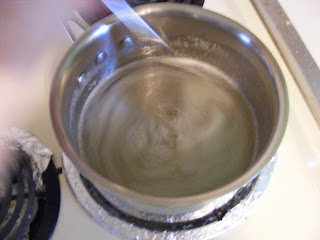
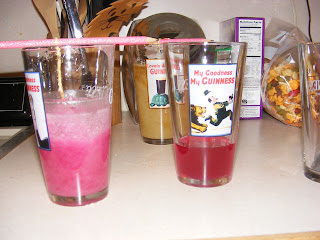
Here we started with some food coloring infused purple water (LIQUID) with ice cubes (SOLID) in it and turned the heat on medium/low. Slowly the ice cubes start to melt, you want them to melt slowly so you can show the process.
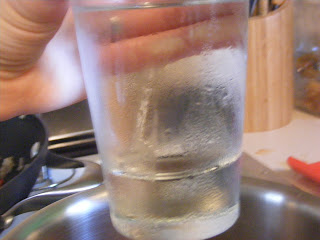
Look at that, you can barely see the ice cubes!!!! Right around now the water will start to steam (GAS), when it does pull that cold glass of water out of the fridge.
The gas should be slightly visible as steam, which is water saturated gas. The nice cool glass will easily start to form condensation, which can launch you into a whole discussion about the water cycle again! HOORAY!
Because we are still talking about the water cycle right? Good. It took me five minutes to write the above three sentences because in my weeks of blog neglect I apparently forgot what post I was on and was thinking that states of matter would have been perfect for the water cycle and was kicking myself that we didn't do it then. I looked up to the title, had a sigh of relief, revised and shared this with you. We all have our moments.
Look at all that fancy condensation! It is good for the kids to feel also, they might be surprised as to how cold it is. On second thought, they might be harder to impress and not be surprised. That is when you put on your best, "I AM SO EXCITED ABOUT LEARNING STUFF" voice and say, "I CAN'T believe how cold it is!! How can it be cold when steam is so hot, and it is very very hot so you better never touch it little kiddo, but how in the world is the condensation cold! Is it because the glass was cold?" And go from there.
I use that voice often when someone (aimee) thinks they are too good to learn about stuff that effects their daily life. It works very well too. In fact I used it with one of our friends to get my kiddo and our friends' kiddo out of a gift shop without having to purchase anything. I told him I was so excited because I had something just for him in my purse! I used the same very, over, super fun, you will never believe what I am about to tell you, voice and it worked. He was so excited, by the time we got to the car he had forgotten, but sticking to my word I reminded him while I casually (frantically, hoping there really was something) looked in my purse. What did I find?? A bag. What was the bag half filled with?? Potato chips. Was he excited?? You bet he was!!! He was thrilled, because I was thrilled! End of story.
Also, while you are boiling water and manipulating it to be whatever you want it to be. You should throw some water in your ice cube tray and put it in your freezer. Taking it out at different intervals to see it freeze. If you have an older kiddo you can time it and pull it out at regulated times and observe and record the different stages of freezing and how long it takes to freeze. What about different containers, would deeper ones freeze faster or slower then shallow ones?? We would have done this, had I thought of it at the time. I am just thinking of it now though. So there it is for you.
The very last thing we did was to create our own little water cycle environment. It is as easy as putting a wet paper towel in a sandwich bag filled with air. Hang it up in a sunny spot and watch the collection, evaporation, condensation, with a little precipitation on the sides magic occur!
Then your done, if you want to be. Or you can keep going!
Happy Themeing!
Aimee & Tiffany!!!
P.S. No mistakes this week. The water cycle is that easy! Even I couldn't mess it up!


