
~The Books~

A Tale of the Navajo The Magic Weaver of Rugs by Jerrie Oughton. This book was wonderful, one of our favorites out of all of them. A Navajo tale of how weaving started for their culture. It shows their history and introduces a strong idea of female characters.
Weaving the Rainbow by George Ella Lyon Illustrated by Stephanie Anderson. This is a beautiful book that illustrates where wool comes from and the process it goes through before you weave it. A different kind of weaving is also exampled, art weaving, not a blanket or scarf but a picture/tapestry. The illustrations are lovely.
The Weaver by Thacher Hurd. The weaver is a little girl who lives above the sky and weaves out happiness, sadness and days activities. At the end of the day she throws her weaving out onto the world.
Aneesa Lee and the Weaver's Gift by Nikki Grimes. A whole book filled with different poems about weaving and the process of weaving. It is wonderful for introducing more poetry within the theme. I always get excited when that happens.
Seven Spools of Thread by Angela Medearis. We didn't actually read this one or do the project that came with the book, but I wanted to include it, since the craft did look so cool. Here are some pics.


Basically you use straws and thread to make a belt. I think this would be wonderful for elementary school age kiddos, especially when the kids are old enough to make friendship bracelets.
Here are the non-fiction books we read.

Kids Weaving was the perfect book for this whole theme. Some of the things in the book were a little beyond our ability, but everything was explained so clearly, it was ultimately a necessary edition to this week. Here are some of the neater things we found in the book.

First off (sorry my daughter has been listing things a lot recently and it is rubbing off on me), the book did a great job explaining what warp and weft was. Warp, is the strings/threads/lines that make the base of your project, they are vertical. These lines do not move, you move around them. The Weft are the lines that you move over and under the lines of the warp. These lines are horizontal.


Now this is where it gets really cool. Later in the book, after many projects that were fairly simple, it dove into more intense projects, for the more serious weaver. These pictures are the step by step instructions to make your own pipe loom. On this loom you can weave anything from belts to blankets, scarfs to purses. It is awesome! I kind of wanted to make one for myself, but I thought better of it. It doesn't look like it would take up much space, but I am sure it would take up more then we have to offer. Maybe later. Anyway, after you make the loom, there are a ton of different patterns and techniques included for boys and girls. Lots of really, really neat stuff. When my daughter is a little older we will definitely be revisiting this book.
The next book, Make it by Jane Bull was pretty handy also. It has a ton of great projects, all of them using recycled material. Great book if you are learning about recycling or needing those sort of crafts. The applicable ideas we took from the book were paper weaving and cardboard weaving. We didn't get to actually do any paper weaving, but we will. They make beautiful cards, if you use old photos or magazine paper. Our cardboard weaving project didn't quite work out, but we will try it again.

Here is a picture of their beautiful paper weaving! It would even be great as wrapping paper, if you did a piece big enough.
~The Crafts~
The main craft we did was weaving a rug using a hula hoop for a loom. You can find the detailed craft here. Thankfully I waited so long to post this theme that family fun posted the craft, that had been featured in their magazine on their website. First you start with a lot of old t-shirts, we didn't have any, so we went to the Volunteers for America store, they have lots, for cheap.

Look at that cat, right at home, little did we know he was laying claim on those t-shirts. These are all of the t-shirts before we washed them. Depending on size of the t-shirts you will need about a dozen. We ended up getting around 15. Some we just couldn't resist. For example. This was my favorite.


(A couple weeks later I saw a woman wearing a yellow button with the same symbol of African on it. She was a part of the group of students who made a difference in Uganda a couple years ago!)
These were my daughters favorites.


Anyway, once you wash all the fabric you will need to cut a ton of 1 inch strips. But you will need 11 loops to start, for the warp.

Tools!!! Someones old bright pink Michigan shirt. We are in Michigan, by the way. For now.

ALSO, I found it very useful to discard the hem of the shirts. They were a little too thick and didn't fit well with the rest of the fabric. I didn't find this out until after I had tried to use a couple already. Once you have your 11 loops you can start building your warp.


(Aimee and I are the ones in the picture :) of course. She is often in dress up clothes, or pajamas, but I think I have mentioned this once before).
Once made you can start weaving. Now are you ready? It is time for a learn from my mistake moment! #1. Again this could have been prevented with a through analysis of the directions, but I was too excited and misread multiple times. When you start weaving, you treat one loop as one strand. So the whole loop both strings of it, you weave together. UNTIL your rug is eight inches big, in diameter, start treating each loop as two individual strands. You will have a lot more the weave through at that point. My mistake was I never started treating the strands separately. After eight inches we kept going over and under both strands on each loop. This is fine, however, our rug is a lot looser then it should be and also a little flimsy on the outside. It would be very easy to undo. HOWEVER! Due to the age of Aimee, 3 1/2 and her little/big hands, I was happy we did this mistake. It made it a lot easier for her to weave by herself. Mistake #2. Do not pull your weft too tight. Your rug will buckle and bump on itself. I thought it would be better to have it tighter, but no. Our rug is fine and will flatten out, eventually. We have a big cat who is helping.


In the mean time keep weaving and weaving.

When you get to the point where you are ready to stop, you can't make it closer then 8 inches from the edge of the hula hoop. Start to close it off. You do this by cutting 1 spoke at a time and tying them closed.


In the end ours looked like this!!


Look at that big cat being helpful!!! Oh Sir Purrs-a-lot! Yes even you can have a great rug for the cat in your life.
Overall we were very happy with this project! It is very easy for a preschooler to do! It is great for pattern learning and repetition. Also very fun to say over-under-over-under-over-under over and over again. Or you can see how fast either of you can say it. We were both giggling.
The next question is, what to do with the rest of those t-shirts? There is a second weaving project you can do with t-shirts. You will need a 12-inch embroidery hoop for this one. Here is the official link! Take the remaining pieces of the shirts, turn them inside out and add some tacky glue to the seams of the sleeves.

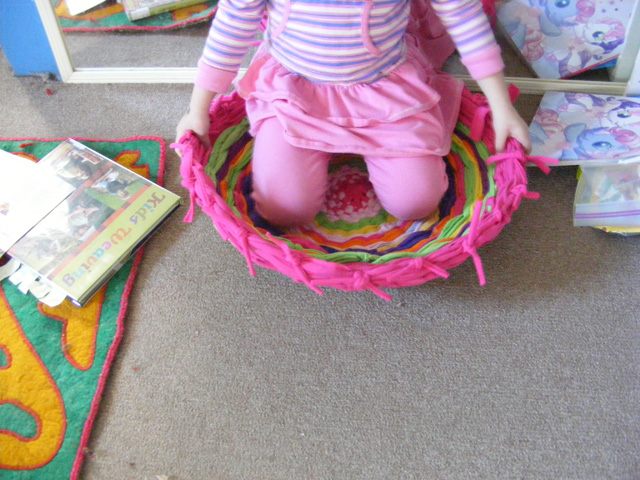
Once dry, cut the sleeves into 1/2 inch loop strips. Start the same way you did the rug, only this time when you get to 4 inches across, start weaving through all the strands. Then to make/form the sides start pulling the strands tightly. This will buckle the weaving and form the basket. To finish it, just go until you are close to the edge but still able to tie the ends. Here are some pics


Mistake #3: Again this one is due to my negligence in direction reading. I wove this basket like the rug. I made a second basket and over wove the entire thing. Sigh. My baskets turned out fine, a little round, but probably because I didn't weave it correctly. I'll get it one day.
~Field Trip!~
Aimee and I decided to take a trip to a local knitting shop and see what real looms looked like. Aimee loved it! The real looms looked fabulous and I think we are hooked. They had ones that were all different sizes and even had people weaving on a couple of them. We really enjoyed seeing the spinning wheels. At this particular shop they sold wool that you could buy and then spin yourself. Aimee, again, had a really good time, she loved looking at the different looms and yarns and especially the giant stuffed animal sheep they had. Now she consistently asks me when we can get a loom. I agree. We want some alpacas and then we can get a loom.
Aimee and I had such a fun time with this week! It is great, we both learned so much and I am so excited to keep weaving. We will be trying to weave a doll blanket with a cardboard loom eventually. My advice there, (we actually started too, but it was so bad I undid the whole thing and cut it out of this post) the finished product of the weaving will be smaller then the loom. Take that into account.
Last note, I also learned something very important myself from the Kids Weave book. If you are not happy with how your project is turning out, there is no harm in un-weaving or taking out some of your weaving. In fact it is a good thing to do, so it turns out just how you like it. Just like in the Odyssey and life.
Happy Themeing everyone!
No comments:
Post a Comment